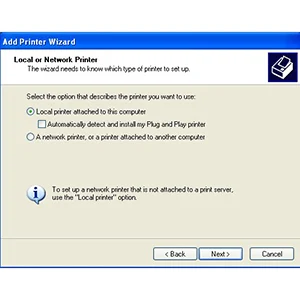
Add Printer Wizard Drivers (Brother Print)
We will provide guide for installing the Add Printer Wizard Drivers for the Brother Printer model.
- The instructions may vary depending on the Windows Operating System version.
- By installing for this driver, the printer icon named "Brother xxxxxx Printer" or look "Brother xxxxxx series" will be add in the Device and Printer section.
- You must be loggin on as an "Admin".
- If the Users Account Control dialog box appears, and click Yes.
- If the Windows Security dialog box appears, check Always the trust software from "Brother Industries,ltd." and please click Install.
For Network Sharing Print:
If your client PC has the same Operating System as the server PC
Step 1
If your client PC has the same Operating System as the server PC
Step 1
- Open the Control Panel.
- Click Hardware and Sound => Devices and Printer => Add a printer.
- Please, click The printer that I want isn't list.
- Select Select a shared printer by name and type the Network Printer Name, e.g. \\server\MFC-xxx
- And click "Next".
- If the warning message appears, please click Install drivers.
- Now, click "Next".
- If you want to use your Brother machine as the default printer, check Set as the default printer. Click Print a test page to check if your machine is working properly.
- Click "Finish".
If your client PC has a different Operating System than the server PC
Important
There are some instances where you should follows the steps above, even if the client PC using a different Operating System than that of the server.
- Once the downloaded is a complete, open the folder or directory and please double click on the download files to extract it.
- Open the Control Panel. See how to open the Control Panel
- Click Hardware and Sound => Devices and Printers => Add a printer.
- Click The printer that I want isn't list.
- Select Select a shared printer by name and type the Network Printer's Name, e.g. \\server\MFC-xxx
- Please, click Next.
- If the Connecting to Printers dialog box appears, click "OK".
- Click Have Disk.
- Click Browse and specify the folder created in Step 1.
- Click "Open".
- Click "OK".
- Click "Next".
- If you want to using your Brother machine as the default printing, check Set as the default printer.
- Click Print a test page to check if your machine is working properly.
- And, Please click "Finish".
Local Printer
- Once the downloaded is a complete, open the folder or directory and please double click on the download files to extract it.
- Open the Control Panel. See how to open the Control Panel
- Click Hardware and Sound => Devices and Printers => Add a printer.
- Click The printer that I want isn't list.
- Select Add a local printer or network printer with manual settings and continue click "Next".
- Select "Use an existing port: (USB port)" and click "Next".
- Click "Have Disk".
- Click "Browse and specify the folder created in Step 1".
- Click "Open".
- Click "OK".
- Select the "model name" and click "Next".
- Select Replace the current driver and click "Next (If applicable)".
- Type a printer name and click "Next".
- Select "Printer Sharing" option and click "Next".
- If you want to using your Brother machine as the default printer, check Set as the default printer.
- Click "Print a test pages" to check if your machine is working properly.
- Click "Finish".
Print Wizard is a automatically intercepts or receives print jobs then filters, adjusts, modifies and converts them in innumerable ways to do auto-fit, text-on-form, multipart form elimination, PCL-to-PDF files conversion, electronic invoicing and much mores.
Add Printer wizard can work well if you installing it correctly.
Have fun surfing

